Set one up
1
Create the offer
Offers, then Create offer, then Discounts, then Pack selector. One starting template, Single, Duo, Trio, which builds three tiers with a Most Popular badge on the Duo.
2
Name it
Title customers see is the heading above the packs and is required. Internal name is private and copies it when left blank.
3
Choose the product
Under Applies to, pick the product this offer runs on. Shoppers who view or buy it see the packs.
4
Build the tiers
Each tier is a quantity plus a saving plus a name. Presets fill in a common set for you.
5
Add badges and gifts where they help
Both are per tier, and both are covered below.
6
Place the block
Copy the offer ID and paste it into a CartSella — Offers block on your product template.
7
Activate it
Set the status to Active and save.
Applies to
The selector takes collections, products and variants in one selection, and filters by vendor or product type. In practice a pack selector is aimed at one product or a small family of them, because the packs are built from the product on the page.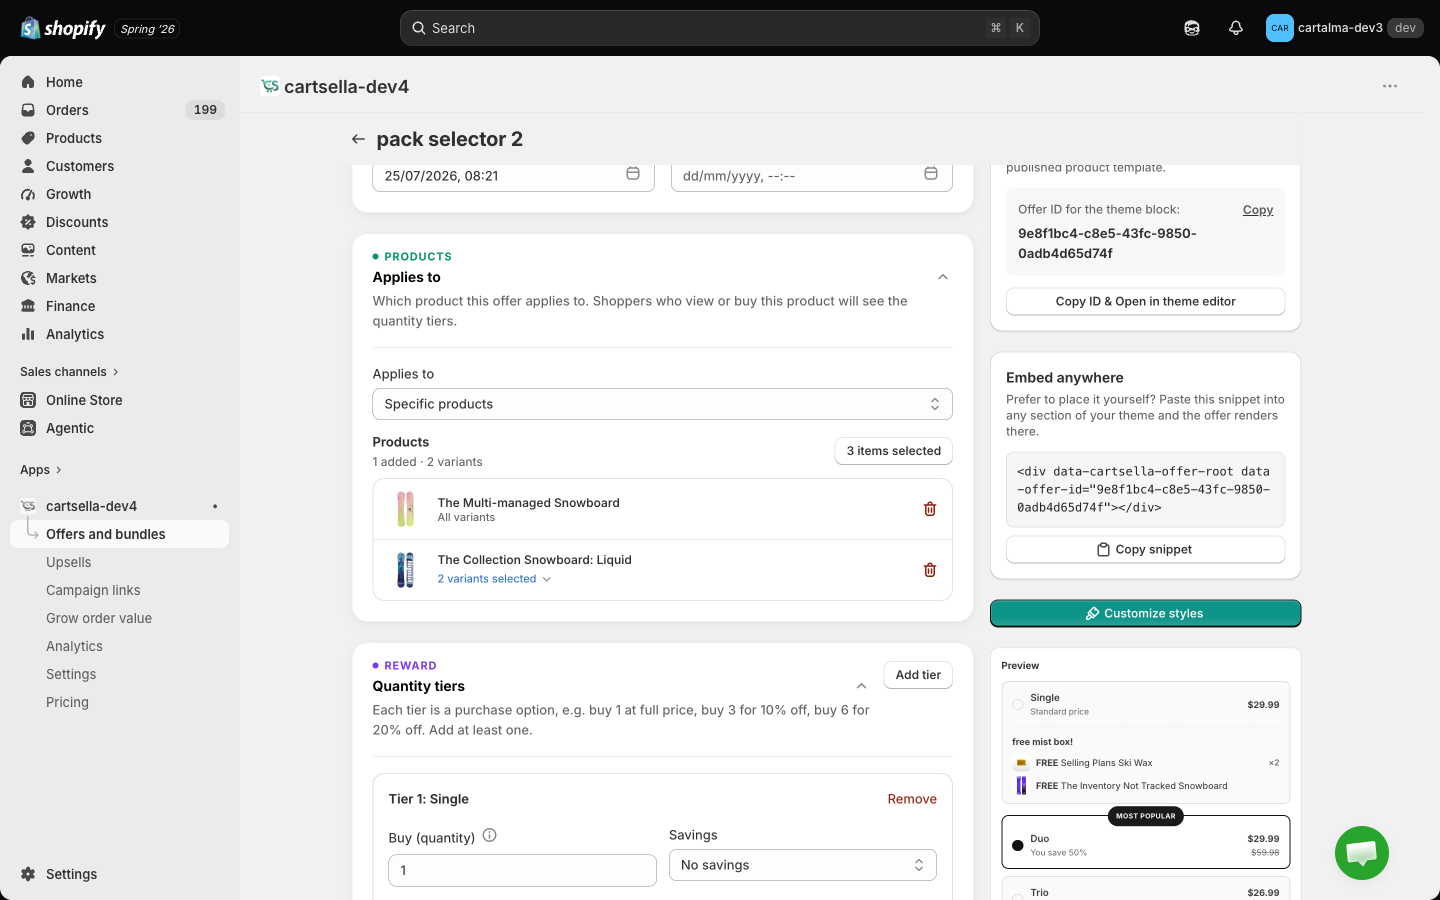
The tiers
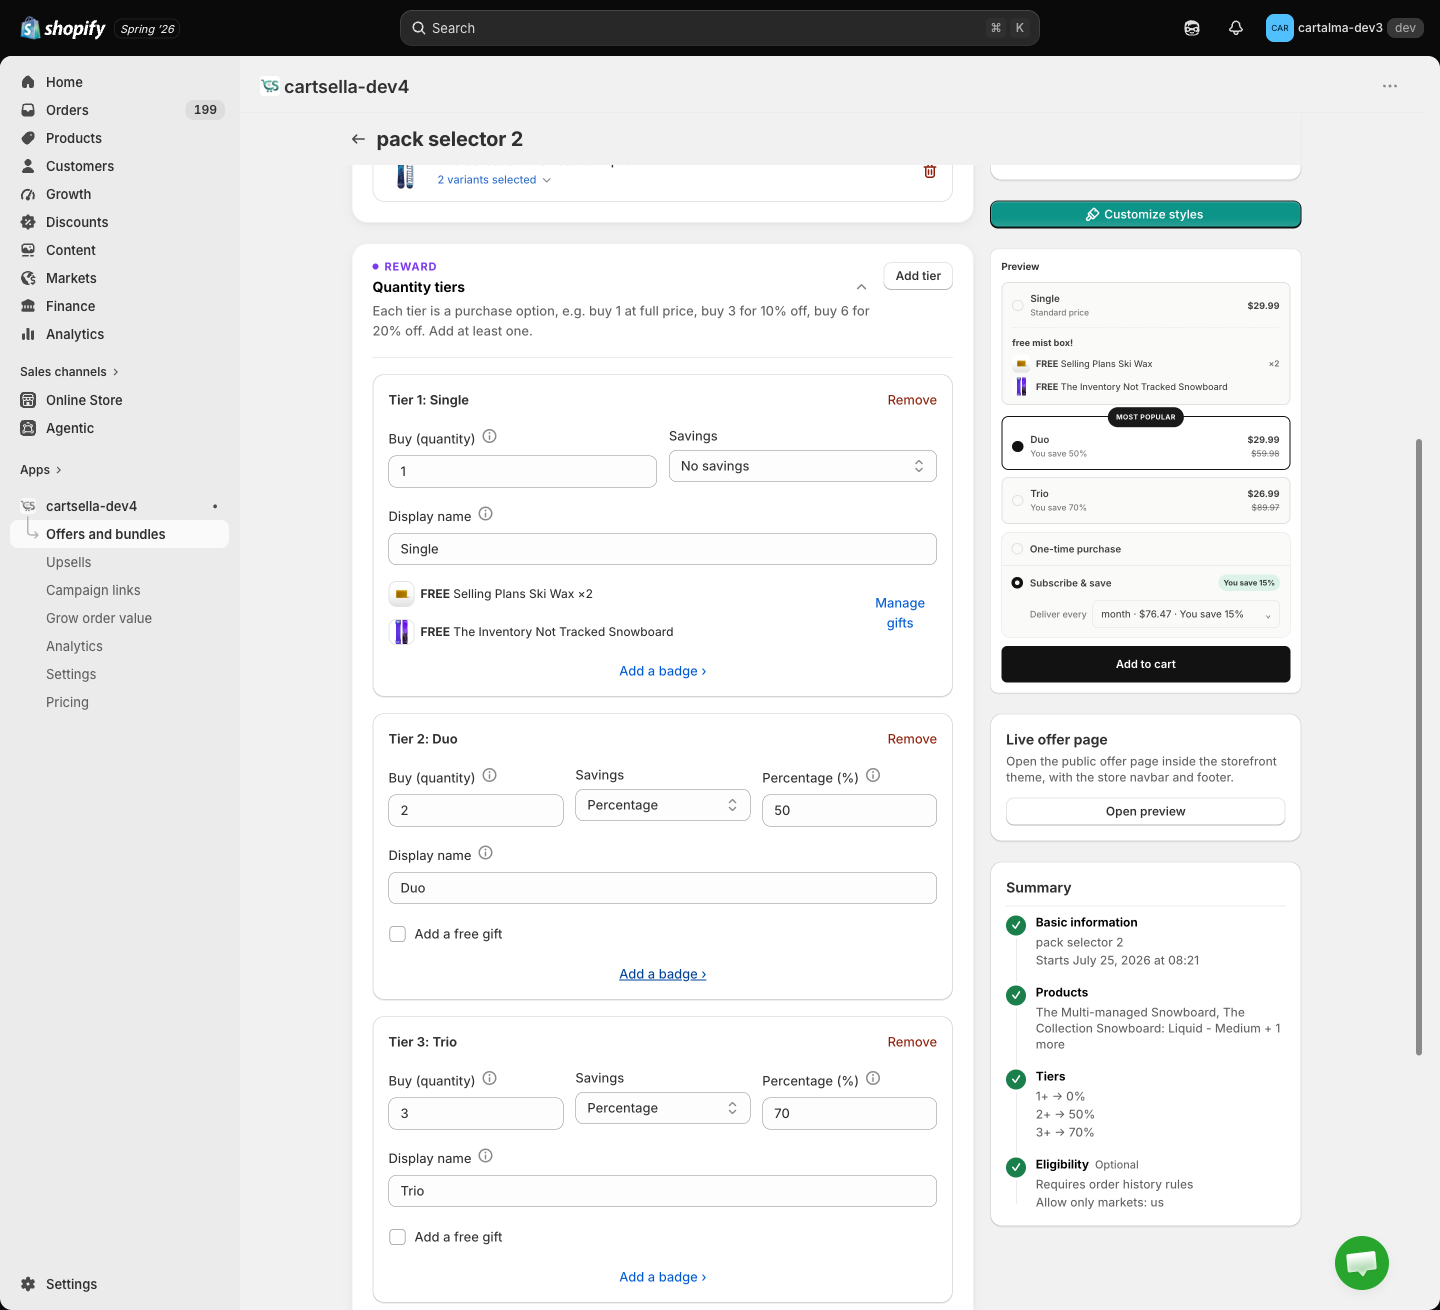
While you have one tier or none, three quick-start presets appear: Single · Duo −10% · Trio −15%, Single · Duo −10%, and 3-pack −15% · 6-pack −25%. A preset replaces the tier list rather than adding to it.
Badges
Click Add a badge › on a tier to reveal Show badge, then Badge label (“Most Popular”) and Badge color. Badge a single tier, the one you actually want people to buy.Pre-selected tier
With two or more tiers, a Pre-selected tier dropdown appears under the list. It decides which pack is already selected when the widget loads. Shoppers can still switch. The default is the first tier.Free gifts on a tier
A tier can hand out several gifts, and each gift has its own quantity. “Buy the Trio, get a free travel size and two sachets.”1
Tick Add a free gift on the tier
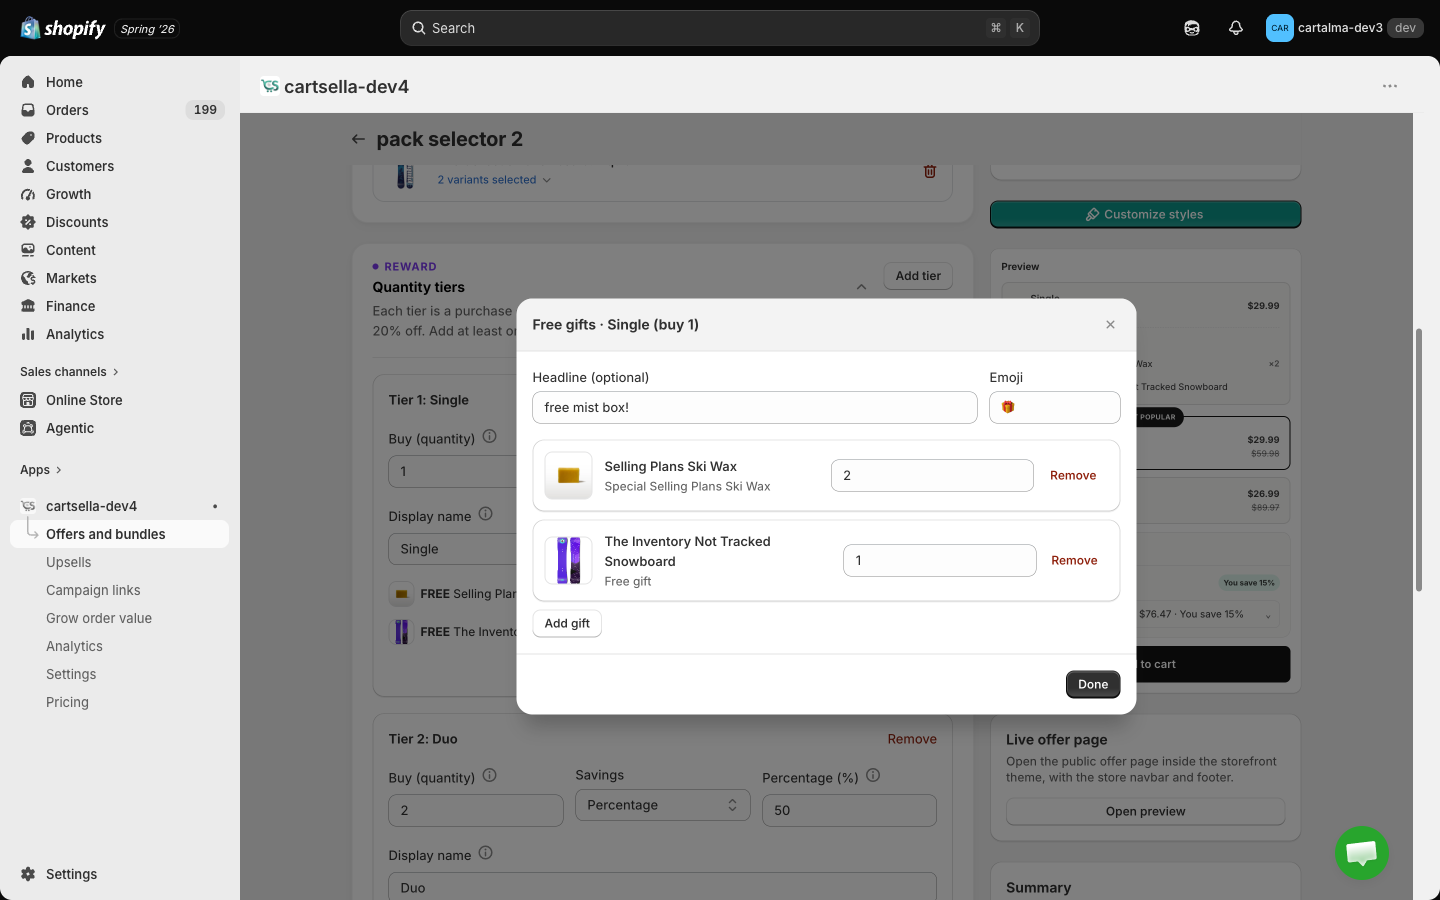
The gift editor opens for that tier only. Gifts are never shared between tiers.
2
Add the gifts
Add gift opens the variant picker, and you can select several variants in one trip. Set a Quantity on each gift row, and remove any you change your mind about.
3
Add a headline, optionally
Headline and Emoji appear above the gift rows on the pack card, for example ”🎁 FREE welcome kit!”.
Stock and gifts
The gift quantities you configure are the ceiling. The shopper can never receive more units of a gift than you set, whatever else happens.- A gift variant with no stock shows an Out of stock badge on its row in the editor, and a banner at the top of the offer.
- On the storefront, a sold-out gift is hidden from the pack card and left out of the add, so it is never promised. Its siblings on the same tier still go through. One sold-out gift never takes the others down with it.
- If the add fails anyway, CartSella retries once with the shopper’s pack alone. They never lose their purchase because a gift could not be fetched.
How it looks to the shopper

- The packs render on the product page, above or below the buy area depending on where you placed the block.
- Selecting a pack with more than one unit reveals a variant picker per item, so a Trio can be three different sizes or colours. A Single pack just uses the variant already selected on the page.
- The pack has its own Add to cart button, which shows “Adding…” and then “Added to cart”, and refreshes your theme’s cart the way the rest of CartSella does.
- Each unit of the pack becomes its own cart line, which is what lets the units differ from each other. The saving is applied to them at checkout.
- If Shopify refuses the add, its own reason is shown to the shopper, for example “Only 5 items are available”, rather than a generic retry message.
- If a variant is not selected or is unavailable, the widget says so instead of adding a broken pack.
Subscriptions
Product page display holds one setting for this type: Show subscription widget. Turn it on and the pack renders its own one-time versus subscribe picker, with the frequency choices your subscription app offers, and the saving each plan gives.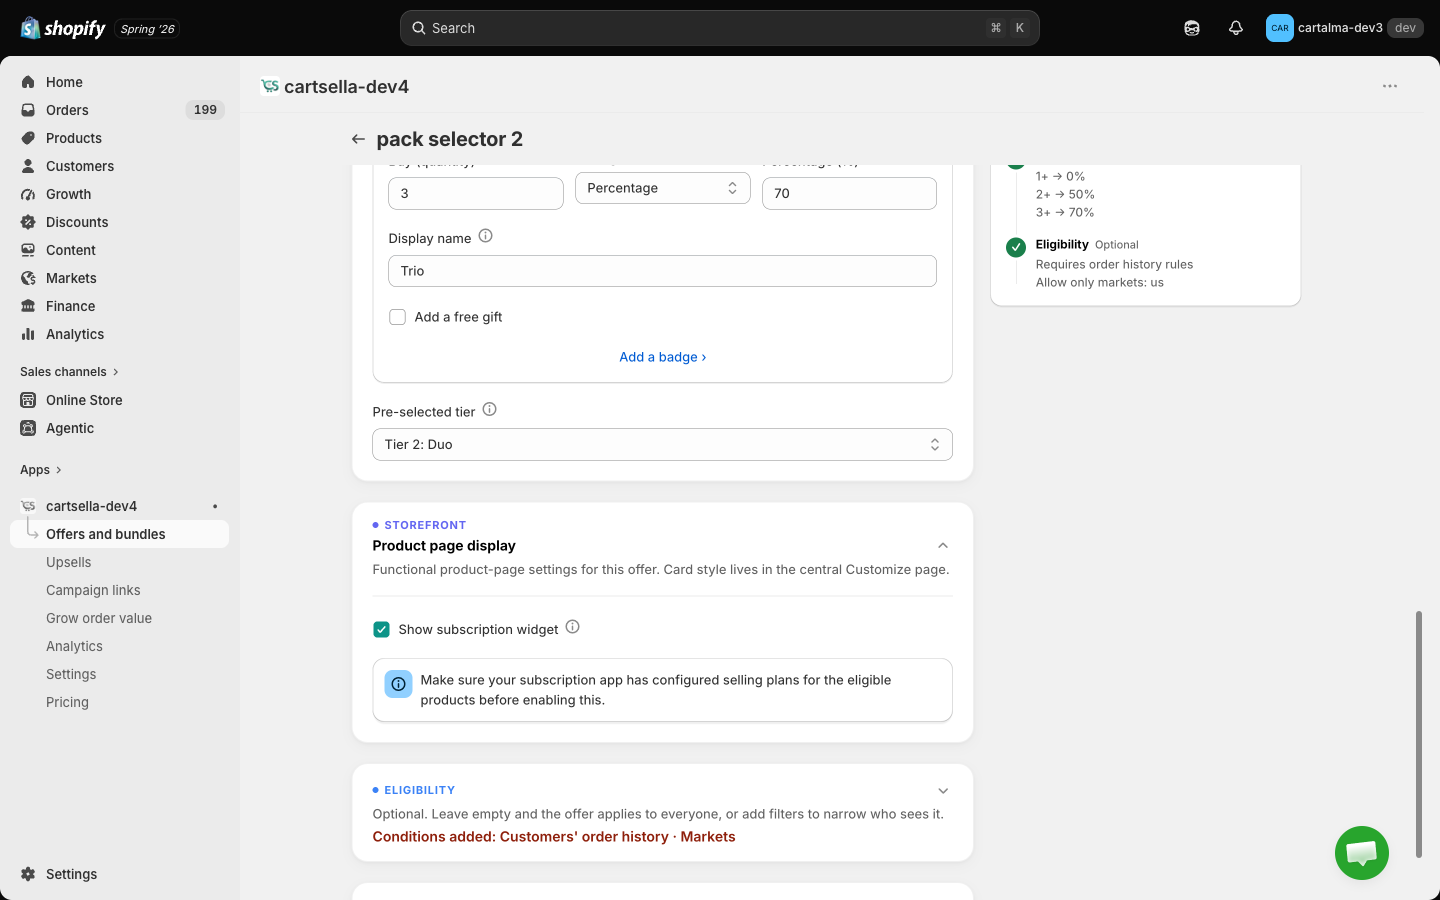
- It is off by default. A store that has never set up selling plans should not have subscriptions offered on its packs.
- The pack always renders its own picker, never the theme’s. Purchase-type widgets differ wildly between themes and subscription apps, and a pack that trusted them could add one-off lines while the shopper thought they were subscribing.
- The plan the shopper chooses rides on every line of the pack. That matters: a pack that qualifies only for subscriptions would otherwise go in as one-off lines and be refused the discount at checkout, and the shopper would pay full price.
- Only plans the selected variant can actually be sold on are offered. Selling plans belong to the product but the prices belong to the variant, so a plan that does not cover the chosen size is never shown.
- The savings shown come from Shopify’s own plan pricing, so the number next to the subscribe row is the price the shopper will really be charged.
- If you add a Purchase type eligibility rule set to Subscription, the pack shows subscription options whether or not the widget setting is on, and drops the one-time option. Without a plan those lines would not be discounted.
Eligibility
Eligibility and targeting on a pack selector accepts purchase type, traffic source, customers’ order history, customer tags, customer location, markets, cart total, item count and products in cart. Every rule you add has to pass. Full detail in Advanced settings.Advanced
Advanced options holds Priority, Maximum uses and Combinations, the same as every other type. See Advanced settings.Pack selector or volume discount
A volume discount can borrow this widget. Turn on Interactive pack builder in its Product page display section and its tiers render as pack cards instead of a table. It stays a volume discount, so it has no per-tier gifts. See Volume discount.
Related
- Volume discount, the automatic version of the same idea
- Gift with purchase, when the gift should follow the cart rather than a pack
- Advanced settings, priority, stacking and usage limits
- Theme blocks, where offers appear in your theme