Choose an offer type
Click Create offer and the flow asks two questions, then offers a starting template.1
What do you want the shopper to do?
Pick a family: Gifts and shipping, Discounts, or Bundles.
2
Choose the offer setup
Pick the exact type inside that family.
3
Pick the starting version
A popup lists ready-made templates for that type, plus Start from scratch. A template only pre-fills fields, you can change every one of them afterwards.
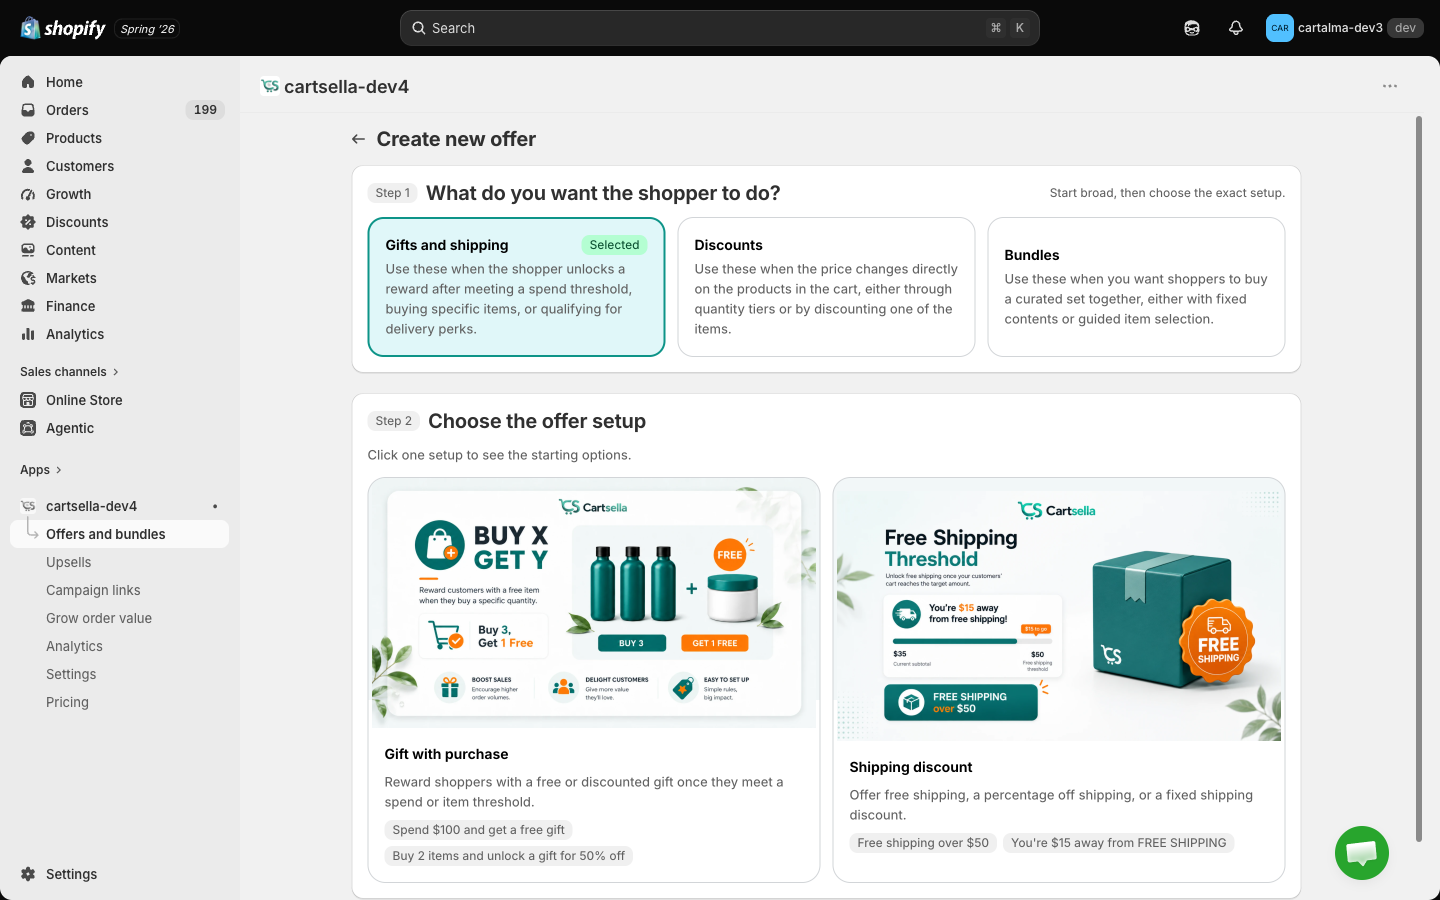
Gifts and shipping
Use these when the shopper unlocks a reward after meeting a spend threshold or buying specific items.Gift with purchase
Add a free or discounted gift once the cart hits a spend or quantity threshold. “Spend $100, get a free gift.”
Shipping discount
Free shipping, a percentage off shipping, or a fixed amount off. “Free shipping over $50.”
Discounts
Use these when the price changes directly on the products in the cart.Automatic discount
A percentage, a fixed amount, or a fixed final price on selected products or the whole order.
Volume discount
Discount tiers that apply on their own as cart quantity grows. “Buy 2+ for 10% off, 5+ for 20%.” Marked Most flexible in the picker.
Cheapest-item discount
BOGO style. Once the shopper reaches the required quantity, the cheapest eligible item is discounted.
Pack selector
A quantity picker on the product page: Single, Duo, Trio, each with its own saving, badge and optional free gifts.
Bundles
Use these when you want shoppers to buy a curated set together.Standard bundle
A predefined set of products sold together at bundle pricing.
Pick your bundle
Shoppers choose eligible items in one step while your rules control minimums and maximums.
Bundle builder page
A step-by-step funnel page where each step has its own rules and product list.
Delivery rules
Delivery rules hide, rename or reorder the shipping methods shoppers see at checkout. They live on their own page under Cart settings, not in the offers list, and they require Shopify Plus.Every plan includes every offer type, plus scheduling, country rules and campaign links. Plans differ only by monthly order allowance and by how many offers, upsells and campaign links can be active at the same time. See Plans and billing.
Settings every offer shares
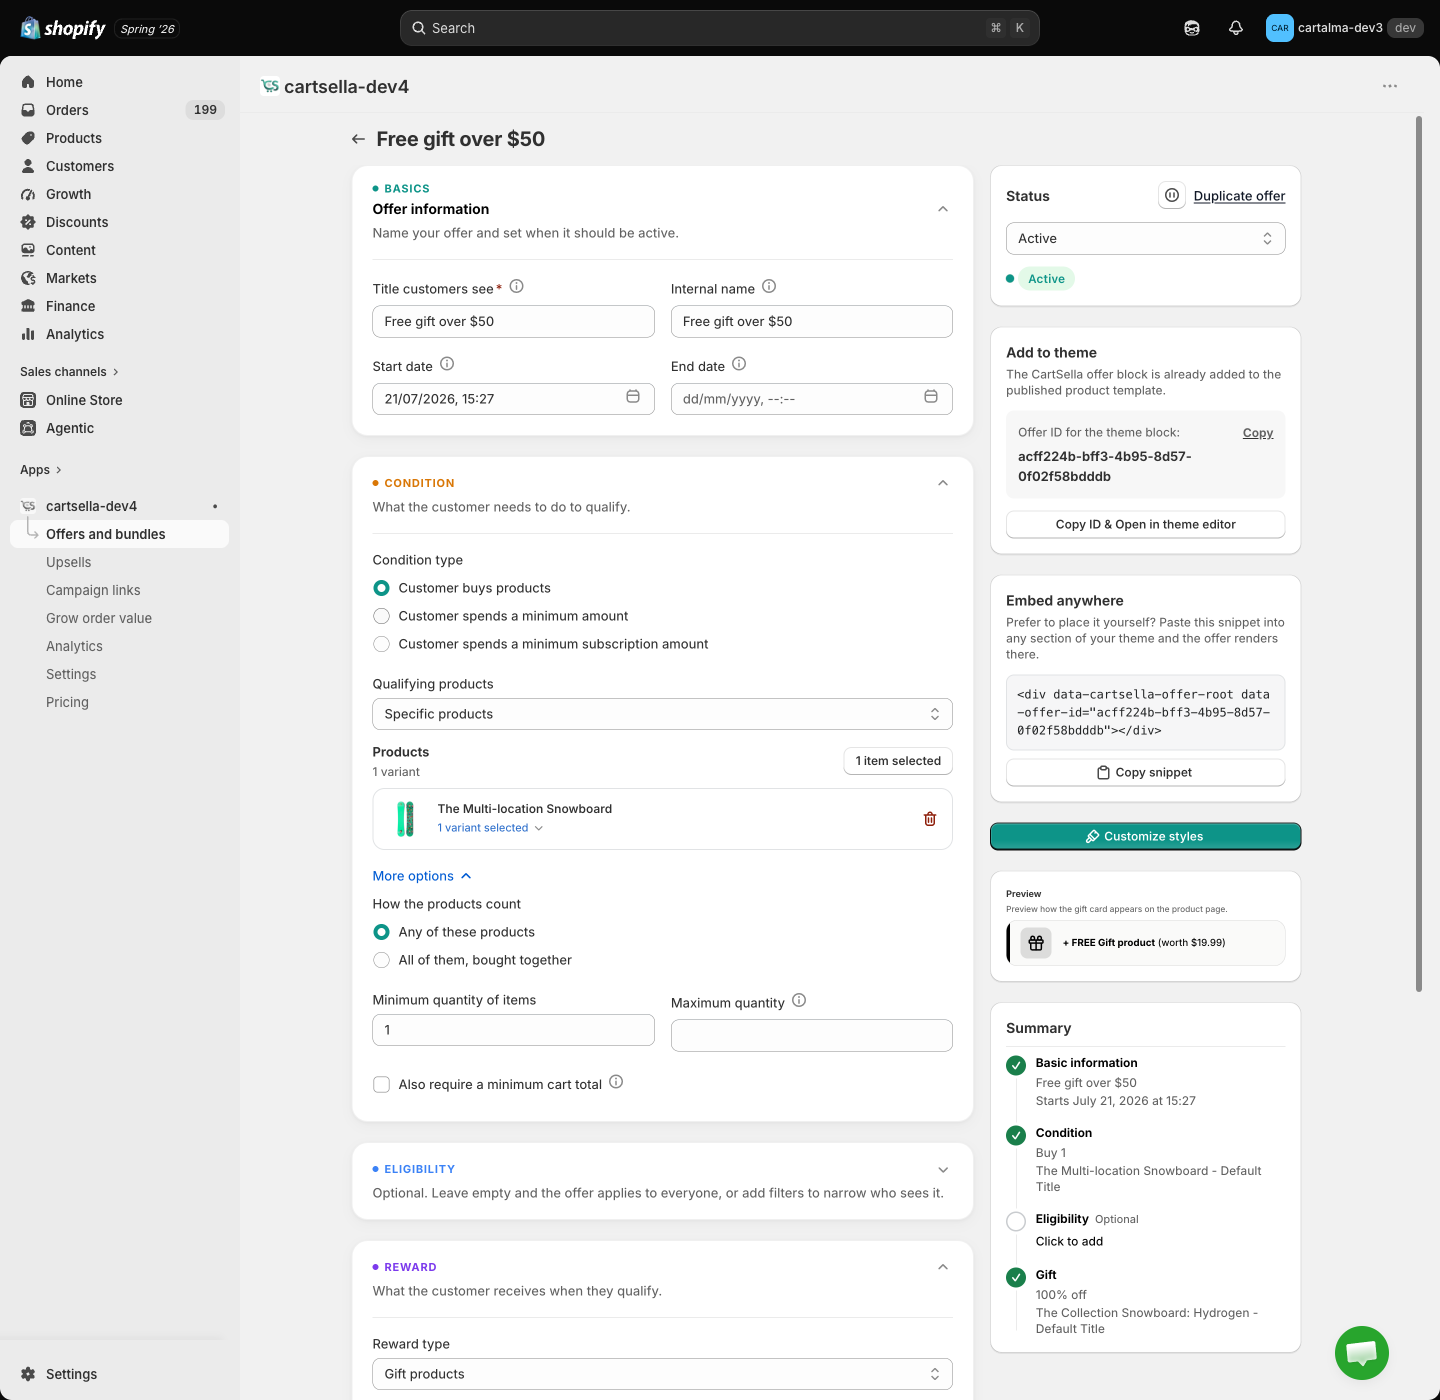
Whatever type you pick, the editor is built from the same sections, always in this order.
Sections are collapsible. A collapsed section shows a one-line summary of what is inside it, so you can scan a whole offer without opening anything.
Naming an offer
Most types have two name fields side by side:- Title customers see is the heading on your storefront, and it is required.
- Internal name is private to your admin. Leave it blank and it copies the customer-facing title.
Scheduling
Start date and End date sit in Basics. Leave the start date blank to go live as soon as the offer is Active, and the end date blank for an ongoing offer. When the end date passes the offer becomes Expired and stops applying. Setting a new end date in the future puts an expired offer straight back to Active.Status
What each status means
What each status means
Show an offer on your storefront
1
Save the offer and copy its ID
The sidebar card shows the Offer ID with a copy button. The same button opens your theme editor.
2
Add the block
In the theme editor, add CartSella — Offers where you want it, usually the product template. For a bundle, add CartSella — Bundles to a page instead.
3
Paste the ID into the block
The block detects the offer type and renders the right layout.
- Live offer page: every saved offer also has a hosted page on your store at
/pages/cartsella-offer?ca_offer=<offer-id>, handy for previewing or for linking from an email. A bundle builder gets/pages/cartsella-funnel?ca_funnel=<offer-id>instead. - Embed anywhere: a small snippet you can paste into any theme section if you would rather place the offer by hand.
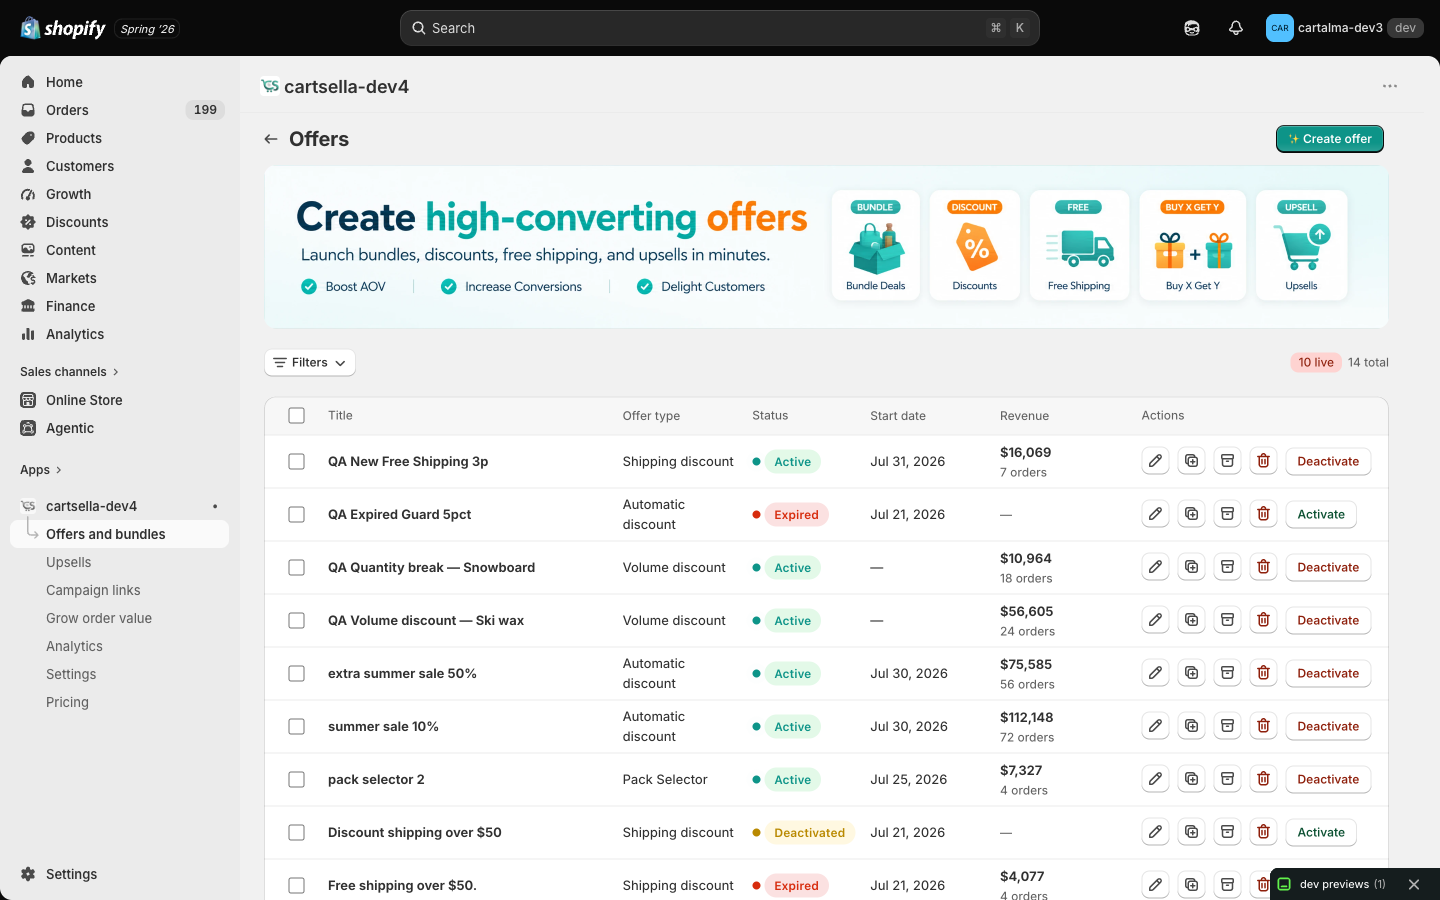
Manage your offers
The Offers page lists everything except delivery rules.- Filters: search by name, filter by offer type, filter by status (including Out of stock).
- Counters: badges show how many offers are live and how many are drafts. The live badge turns amber and then red as you approach your plan’s active limit.
- Row actions: edit, duplicate, archive, delete, and turn off or turn on.
- Bulk actions: select rows to activate, deactivate or archive several at once. If some could not change, usually the active-offer limit on your plan or an offer still missing something it needs to go live, a banner tells you how many were skipped.
- Revenue: each row shows the lifetime attributed revenue for that offer. Full reporting is in Analytics.